Click the Settings
tool button (![]() ) on the Standard toolbar.
) on the Standard toolbar.
or
Choose Settings... in the
Settings menu.
The Settings dialog opens.
Go to Program Options > Files > Projects > Project search paths.
Project names are especially useful to manage xrefs and images when exchanging drawings. If external references (xrefs) and images are not found in the saved path, the project search paths are used to find the external references and images. Project names are saved in the registry and contain one or more search paths.
Click the Settings
tool button (![]() ) on the Standard toolbar.
) on the Standard toolbar.
or
Choose Settings... in the
Settings menu.
The Settings dialog opens.
Go to Program Options > Files > Projects > Project search paths.
To create a project:
Open the Project settings.
Click the Browse
button at the right hand side of the Project
search paths settings field.

The Project Settings dialog
opens.
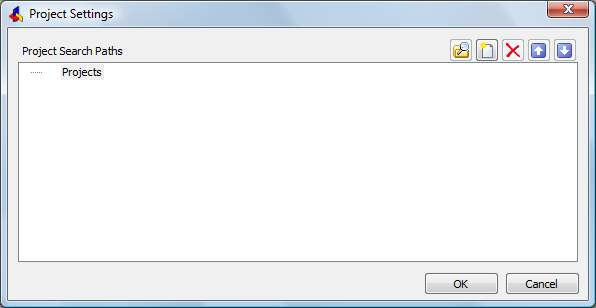
To create the first project:
Click the New
button (![]() ) on the Project
Settings dialog.
) on the Project
Settings dialog.
![]()
Type a name to replace the NewProject1 default name.
To create additional projects.
Click Projects (on top of the projects tree) then click
the New button (![]() ) .
) .
Type a name to replace the NewProject1 default name.
Adding search paths to a project
To add a search path to a project:
Open the Project settings.
Select the project in the Projects tree.
Click the New
button (![]() ).
).
The Browse for folder dialog
opens.
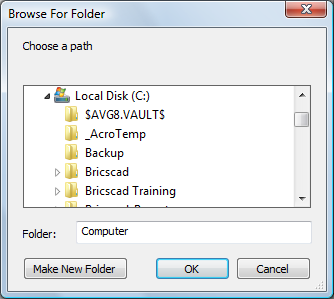
Do one of the following:
Select a folder.
Select a parent folder, then click the Make New Folder button to create a new folder.
Click the OK button to add the selected folder to the project search paths.
Changing the order of the search paths
Open the Project settings.
Click the expand button (+) of the project you want to edit.
Select a search path, then click the up
(![]() ) or down (
) or down (![]() ) buttons to change the order
of the search paths.
) buttons to change the order
of the search paths.
Assigning a project to the current drawing
Open the Project settings.
Type the name of an existing project in the
Project name settings field
(PROJECTNAME system variable).
| © Menhirs NV. All rights reserved. |