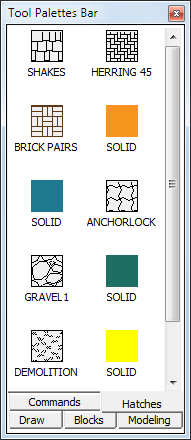
To open the Tool Palettes Bar
Do one of the following:
-
Hover over a toolbar (Windows) or an empty
toolbar area (Windows and Linux), then right click and choose
Tool Palettes Bar in the context
menu.
-
Type toolpalettes in the command bar, then press
Enter.
To
set the view options
- Right click in an empty space of the icon area on
the Toolpalettes Bar and choose
View Options... in the context
menu.
The View Options dialog displays.
- Drag the Image Size
slider to adjust the image size.
- Select either Icon with
text or Icon only.
- Choose either Current
Palette or All Palettes from
the Apply to list button.
- Click the OK button
to confirm.
To
add a new tool palette
- Move the cursor to the icon area of the
Tool Palettes Bar, then right
click.
A context menu displays:
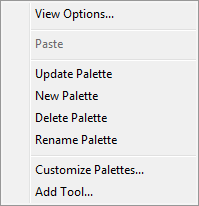
- Choose New Palette
in the context menu.
A new tab is added.
- Type a name for the new palette in the
Name field.
To import a tool palette
- Move the cursor to the icon area of the
Tool Palettes Bar, then right
click.
A context menu displays:
- Choose Customize
Palettes in the context menu.
The Customize dialog box
displays:
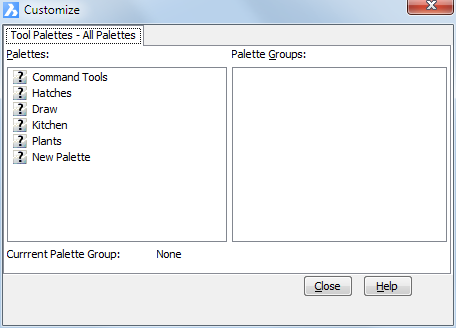
- In the Palettes pane
on the Customize dialog box, right
click and choose Import in the
context menu.
- On the Import
Palette dialog, select a folder, then select a palette file
(*.btc or *.xtp).
- Click the Open
button or double click to import the palette.
The palette is added in the Palettes
list.
- Click the Close
button to close the Customize dialog
box.
To rename a tool palette
- Right click tool palette tab and choose
Rename Palette in the context
menu.
- Type a new name for the palette in the
Name field.
- Press Enter to confirm.
To delete a tool palette
- Right click tool palette tab and choose
Delete Palette in the context
menu.
- Click the OK button
on the Confirm Palette Deletion
box.
Adding a hatch pattern
- Select the palette you want to add a hatch pattern
to.
- Open the
Hatch and Gradient dialog box.
- Select either Predefined or Custom from the Type list button.
- Double click the Swatch field on the Hatch
and Gradient dialog box.
The Hatch Pattern Palette
displays.
- Select the hatch pattern you want to add, then
right click.
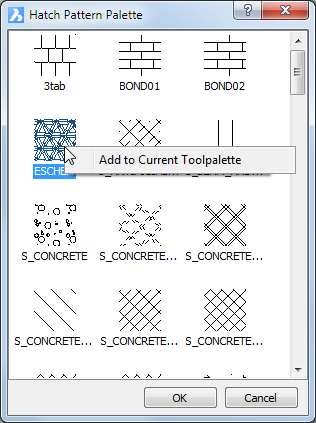
- Choose Add to Current Tool
Palette.
The hatch pattern is added on the current tool palette.
- (option) Repeat steps 5 and 6 to add more hatch
patterns.
Adding a
block
Blocks can be added from the current drawing or from any
drawing.
To add a block from the current drawing:
- Choose Drawing Explorer -
Blocks in the Tools menu.
- On the Drawing Explorer -
Blocks dialog box select the block or blocks you want to
add.
- Right click and choose Add
to Current Tool Palette in the context menu.
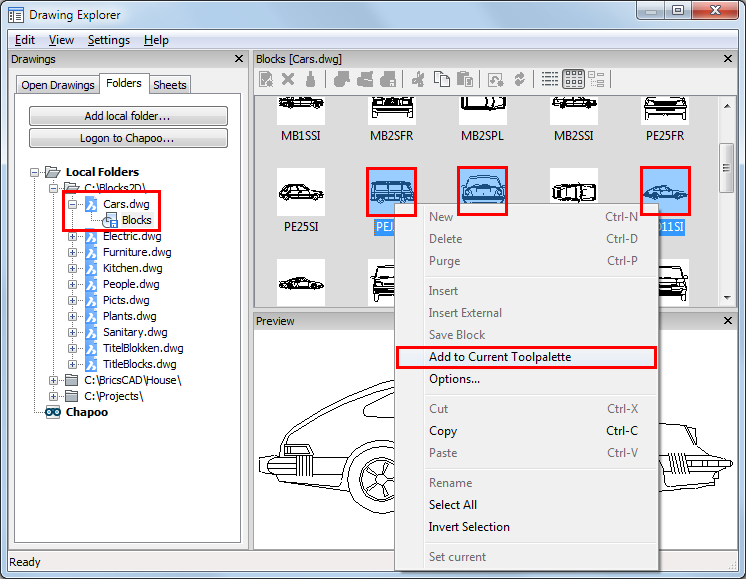
To add a block from any drawing:
- If not already available, add the containing
folder to the Folders
list on the Drawing Explorer -
Drawings dialog box.
- Select the drawing in the containing folder on the
Drawing Explorer - Drawings
dialog box.
- Click the Expand
icon (+) of the containing drawing.
The Blocks icon of the drawing
displays.
- Click the Blocks
icon of the containing drawing.
The blocks in the drawing display in the Details pane.
- Select the block or blocks you want to add.
Press and hold the Ctrl key to select multiple blocks.
- Right click and choose Add to Current Tool Palette in the context
menu.
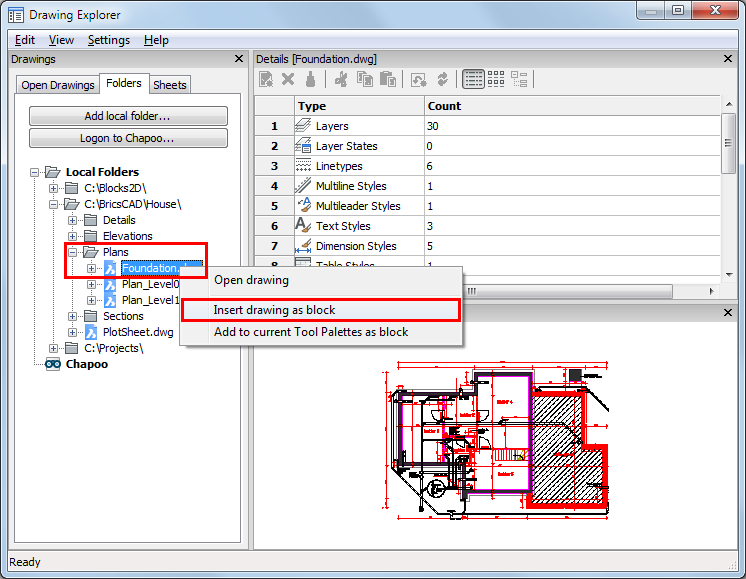
To add a drawing as a block:
- If not already available, add the containing
folder to the Folders
list on the Drawing Explorer -
Drawings dialog box.
- Select the drawing in the containing folder on the
Drawing Explorer - Drawings
dialog box.
- Right click and choose Add
to Current Toolpalette as block in the context menu.
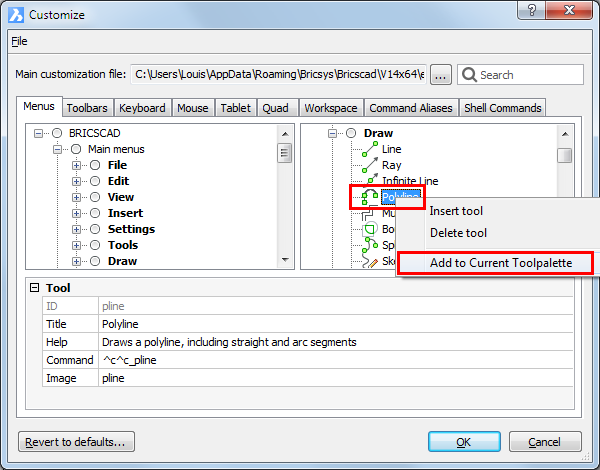
Adding a command
- Choose Customize in
the Tools menu.
- Under Available
Tools on the Customize dialog,
expand the containing toolbox, then select the command in the
commands list.
- Right click and choose Add to Current Tool Palette in the context
menu.
|
NOTE
|
See the topic Creating
Custom Tools to create your own tools, which you can then add
to a tool palette.
|
Editing a
tool
General procedure to edit a tool on a tool palette:
- Right click the tool, then choose Properties in the context menu.
The Tool Properties dialog box
displays.
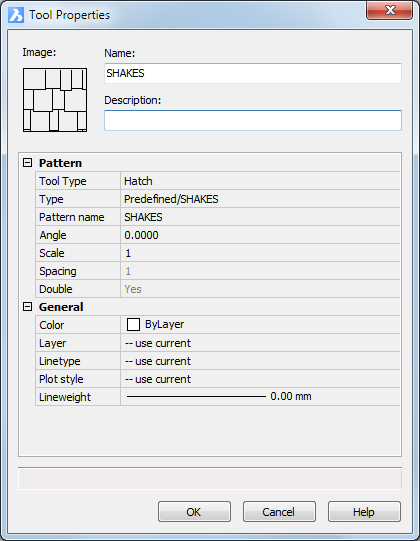
Hatch tool
properties
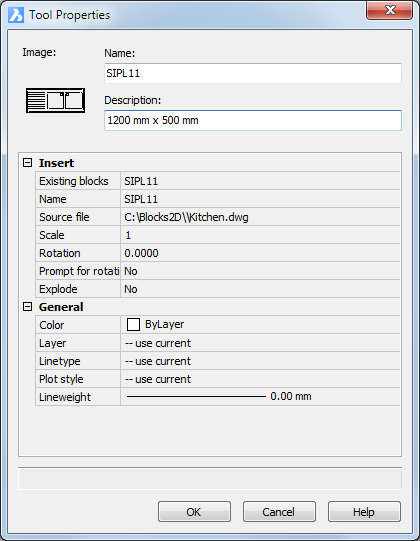
Block tool
properties

Command tool
properties
- Edit the tool properties.
- Click the OK button
to confirm.
Managing tools
To manage the tools on a tool palette do the following:
- Right click the tool.
A context menu displays:
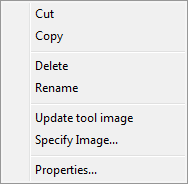
- Choose an option in the context menu.
To specify a tool
image
- Right click the tool and choose Specify Image in the context menu.
A file dialog box displays.
- Select the image file, then click the Open button.
|
NOTE
|
To restore the original tool image: Right click the tool and
choose Remove Image in the context
menu.
|
To move a tool
To move a tool from one palette to another, do the
following:
- Right click the tool on the source palette and
choose Cut in the context menu.
- Select the target palette.
- Right click and choose Paste in the context menu.
The tool is added at the bottom of the palette.
To copy a tool
To copy a tool from one palette to another, do the
following:
- Right click the tool on the source palette and
choose Copy in the context menu.
- Select the target palette.
- Right click and choose Paste in the context menu.
The tool is added at the bottom of the palette.
|
© Menhirs NV. All rights reserved. |