Define a View
Commands: DVIEW and CAMERA
The Define View command
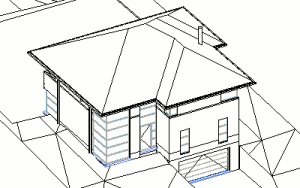
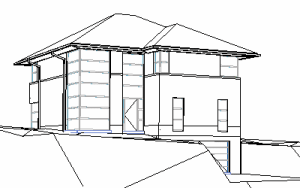
dynamically defines parallel perspective or visual perspective
views of your 3D models.
The Camera command creates
perspective views.
The projection method of a view is controlled by the
Perspective property of the view:
-
If ON, the view is a visual perspective view.
-
If OFF, the view is a parallel perspective view.
|

|

|
|
Parallel Perspective View
|
Visual Perspective View
|
The following parameters are used in the Define View procedure:
-
Target Point:
Defines the center of the view (1)
-
Camera Point:
Defines the view point and view direction (2).
-
Distance to Target:
Distance between the camera position an the target point (3).
Defining a camera view
The Camera command creates a
named view.
- Do one of the following:
- Click the Camera tool button (
 ) on the View toolbar.
- Choose Camera
in the View menu.
- Type Camera
in the command bar.
The command bar reads:
Specify camera location:
- Do one of the following:
- Click a point in the drawing.
- Type the coordinates of the camera location
in the command bar and press Enter.
The command bar reads: Specify target location:
- Do one of the following:
- Click a point in the drawing.
- Type the coordinates of the target location
in the command bar and press Enter.
The command bar reads: Enter an option:
?/Name/LOcation/Height/Target/LEns/Clipping/View/<eXit>:
- Do one of the following:
- Press Enter to create the camera view using
a default name (e.g. Camera1).
- Enter an option:
-
- Name:
Prompts you: Enter name for new camera <Camera1>:
Type a name at the command prompt, then press Enter.
- Location:
Prompts you: Specify camera location <current location>:
Click a point or enter new coordinates of the camera location, then
press Enter.
- Height:
Prompts you: Specify camera height <current height>:
Enter a new height (Z-coordinate) for the camera location.
- Target:
Prompts you: Specify target location <current location>:
Click a point or enter new coordinates of the target location, then
press Enter.
- Lens:
Prompts you: Specify lens length in mm <50.00>:
Enter an new lens length, then press Enter.
- Clipping:
Prompts you: Enable front clipping plane? <Yes>/No:
Choose Yes to define the front clipping plane.
Prompts you: Specify front clipping plane offset from target plane
<0.00>:
Type value in the command bare or specify the distance by clicking
two points.
Prompts you: Enable back clipping plane? Yes/<No>:
Choose Yes to define the front clipping plane.
Prompts you: Specify front clipping plane offset from target plane
<0.00>:
Type value in the command bare or specify the distance by clicking
two points.
- View:
Prompts you: Switch to camera view? Yes/<No>:
Choose Yes to display the camera view.
This option concludes the Camera
command.
|
NOTE
|
Choose Drawing Explorer >
Views... in the Tools menu to
edit a camera view.
|
To toggle the perspective property of
view
Do one of the following
- Click the Perspective tool button (
 ) on the View toolbar.
The state of the tool button, pressed or not, indicates the current
value of the PERSPECTIVE system variable.
- Choose Perspective in the View menu.
- Type perspective in the command bar.
The command bar reads: New current value for PERSPECTIVE (Off or
On) <On>:
A prompt menu displays.
Do one of the following:
-
- Type off or
on in the command bar, then press
Enter.
- Choose Off or
On in the prompt menu.
|
© Menhirs NV. All rights reserved. |

