The Quad cursor
menu
The Quad cursor menu, aka the Quad is an alternative to
grip-editing of entities, offering a (much) richer set of editing
operations while requiring fewer clicks, without cluttering the
screen with loads of grip-glyphs.
While the Quad was initially conceived for easy and fast editing
of 3D solids, the Quad is extended to allow enhanced editing and
creating of all entity types.
To
activate the Quad
Activation of the Quad is controlled by the QUADDISPLAY
system variable.
To toggle the Quad On/Off, do one of the following:
- Click the
QUAD field in the
Status bar.
- Press the F12
function key.
- Edit the QUADDISPLAY system variable in the Settings
dialog.
- Type quaddisplay in the command bar, then choose an
option.
Editing the Quad settings
- Right click the QUAD
field in the
Status bar, then choose Settings
in the context menu.
The Settings dialog
opens, showing the Quad settings:
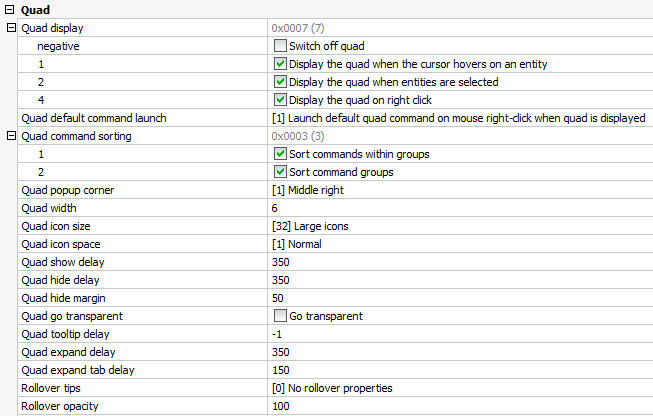
- Quad display:
Determines when the Quad displays.
-
- Negative: Switches the Quad
off.
- 1: When the cursor is over an entity.
The entity under the cursor highlights.
- 2: When entities are selected
- 4: On right click when no entities are
selected and there is no entity under the cursor.
- Quad default command
launch: Sets the action to launch the default Quad
command.
-
- 0: Click the button.
- 1: Right click
- Quad command
sorting:
-
- 1: Sort
commands within groups:
ON: Set the most recently used command first.
OFF: Command order as defined in the current
CUI.
- 2: Sort
command groups:
ON: Set the most recently used group first.
OFF: Command group order as defined in the current
CUI.
- Quad popup
corner: Controls the popup position of the Quad relative to
the cursor position: Upper,
Center or Middle Right.
- Quad width:
Defines the number of commands in a row. Default = 6 commands.
-
Quad icon size:
Small icons (16 x 16 pixels) or Large icons (32 x 32 pixels)
|
|
|
|
Small
Icons
|
Large
Icons
|
-
Quad icon
space: Defines the size of the Quad tool buttons: narrow,
normal or large.
- Quad show
delay: Sets the time lap in milliseconds between the
highlighting of the entity and the Quad display.
- Quad hide
delay: Sets the time lap in milliseconds to hide the Quad
when the cursor is outside the Quad hide
margin limit.
- Quad hide
margin: Sets the distance in pixels the cursor can move away
from the Quad. If the cursor moves outside this limit, the Quad is
hidden.
- Quad go
transparent: Defines whether the Quad becomes transparent
when the mouse moves outside the Quad, but within the Quad hide margin.
- Quad tooltip
delay: Sets the delay time in milliseconds to display
tooltips. If the value is negative, no tooltips display.
- Quad expand
delay: Sets the time lap in milliseconds to expand the Quad
after mouse-enter.
- Quad expand tab
delay: Sets the time lap in milliseconds to expand a group
tab after mouse-enter.
- Rollover tips:
Specifies whether entity
properties display in the Quad while hovering.
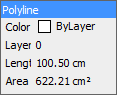
- Rollover
opacity: Specifies the degree of opacity when the Quad is in
rollover state. Values between 10 (very transparent) and 100 (fully
opaque) are accepted.
- To edit a setting, select the setting then do one
of the following:
- Type a new value.
- Click the check box.
- Choose an option.
- Close the Settings
dialog.
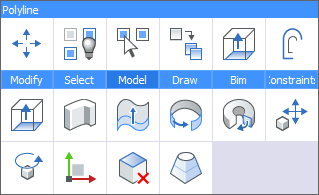
The
Quad layout
The layout of the Quad cursor menu depends on:
- The entity type under de cursor.
- The current
Workspace.
- Geometric events such as intersection or
tangency.
- When the cursor hovers over an entity, the
entity highlights and the Quad displays the command most recently
used with this entity type.
When multiple entities are under the cursor, hit the TAB key to
highlight all entities one by one.

If QUADCOMMANDLAUNCH = 1, right click to launch the command.
If QUADCOMMANDLAUNCH = 0, click the command button.
- If
Rollover Tips = ON the properties of the entity under the
cursor display in the Quad if ROLLOVERTIPS = 1
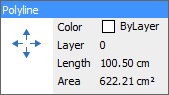
or on entering the Quad title bar if ROLLOVERTIPS = 2.
If the Quad display is off, rollover tips display if:
- SELECTIONPREVIEW
= 1 or 3
- ROLLOVERTIPS = 1 (Show properties on hover).
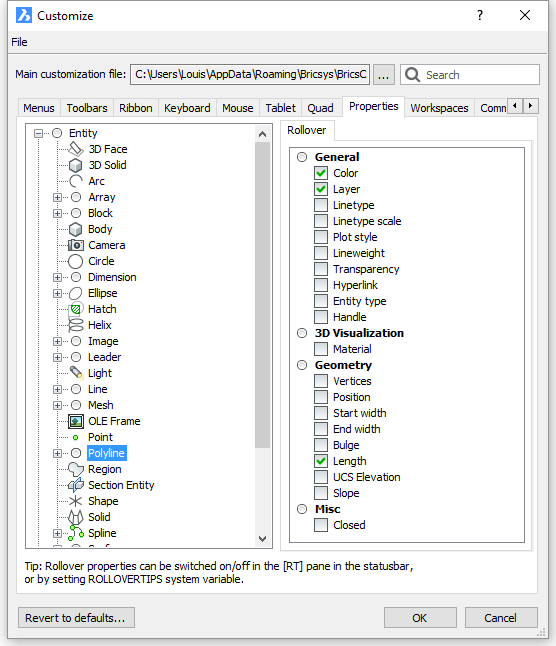
Which properties display for each entity type is specified in
the Properties
tab of the Customize dialog
box.
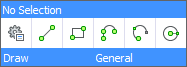
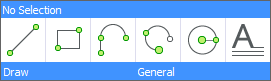
- Move the cursor to the Quad to display the
most recently used commands with this entity type.
A number of command category tabs display at the bottom.

The number of buttons is controlled by the
QuadWidth user preference.
Which command group tabs display depends on the
current Workspace.
See To edit the
workspace command groups to switch closed command groups
on.
Click an icon to launch the command.
Click an icon to launch the command.
Using
the Quad
- Move the cursor to the entity you want to
manipulate.
The entity under the cursor highlights and the Quad displays the
most recently used command with this entity type.
- (option) Select more entities.
See Selecting multiple
entities.
- Do one of the following:
- Depending on the value of the QUADCOMMANDLAUNCH
system variable, either right click or click the Quad to repeat the
most recently used command.
- Move the cursor to the Quad and select a
different command.
See The Quad Layout.
- Execute the command.
Selecting multiple entities
- Move the cursor over the first entity, then click
when the entity highlights.
The entity is selected and remains highlighted.
- Move the cursor to another entity, then click when
the entity highlights.
The entity is added to the selection set and remains
highlighted.
- (option) Repeat step 2 to select more
entities.
- (option) Move the cursor to a selected entity,
then press and hold the Shift key and click.
The entity is removed from the selection set.
|
NOTES
|
-
When the Quad is active,
SELECTIONPREVIEW is neglected, unless a command prompts for
entity selection.
-
When working with solids:
-
The
SELECTIONMODES system variable controls which subentities are
detected: edges, faces and/or boundaries.
Holding down the Ctrl key inverts the current selection mode.
-
Click a button on the Selection
Modes toolbar to toggle an option. A pressed button
indicates the option is selected.
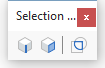
 Enable detection of 3D solid
edges Enable detection of 3D solid
edges
 Enable detection of 3D solid
faces Enable detection of 3D solid
faces
 Enable boundary detection Enable boundary detection
|
Selecting edges of faces or solids
Command: DmSelectEdges
- Select the faces and or solids.
See Selecting multiple
entities.
- In the Direct
Modeling command group of the Quad cursor menu, click the
Select Edges tool (
 ).
).
All edges of the selected faces and solids are selected.
- (option) To remove edges from the selection set:
press and hold the Shift key, then click the edge(s).
Using the Quad to create entities
If the flag of the QUADDISPLAY
system variable is set, entity creation commands are available in
the Quad.
To set the Display the Quad on right
click option: Right click the
Quad field in the Status Bar and
check the option in the context menu.
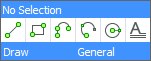
The available entity creation commands in the Quad:
-
The most recently used commands. The number of available
commands depends on the QuadWidth
user preference.
-
A number of command group tabs, depending on the current
workspace.
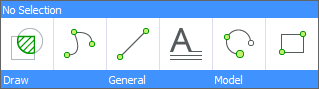
|
NOTE
|
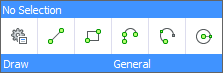
If the cursor is on an entity, hold down the right mouse button
longer to display the No Selection
Quad.
|
Customizing the Quad
The Customize dialog box, which is
opened by the Customize command,
has two section tabs that are involved:
-
The Quad section:
In this section, the name and content of all Quad Tabs can be
specified, similar to the way Ribbon Tabs are customized. Quad Tabs
can be created, copied, renamed and deleted. Manage the content of
a Quad Tab by dragging buttons from the right side of the dialog,
or by using the right-click context menu to add, rename, move or
delete Quad Buttons. The right side of the dialog contains the full
list of all buttons which can be shown in the quad. These include
the tools defined in the cui file, plus all internally defined Quad
Buttons, which are listed under the new 'Built-in' branch at the
bottom. These built-in buttons are similar to the tools, only they
can not be edited: their name, icon, command string etc.. are
read-only. The condition which specifies whether a certain Quad
Button will appear in the quad when the cursor hovers on an entity,
is specified for each Quad Button individually in the 'Object
Filter' property, similar to the way Object Context Menu Items are
configured. It is not possible to modify the Object Filter of a
built-in Quad Button.
-
The Workspaces section:
This section defines which Quad Tabs will be available in the Quad,
in which order, and in which workspace. In this interface, the user
can add/move/remove entire Quad Tabs. The contents of the Quad Tabs
is not shown nor editable in this section, as this is now done in
the 'Quad' section of the dialog. When a new Quad Tab is created in
the Quad section, this Quad Tab is automatically added to the Quad
in all workspaces.
To edit
the Quad tabs of a workspace
- Move the cursor over a toolbar, then right click
and choose Customize in the context
menu.
- Click the Workspace
tab on the Customize dialog box.
- Expand the workspace you want to edit.
- Expand the Quad Tabs
list.
Tabs that are currently switched off display in grey.
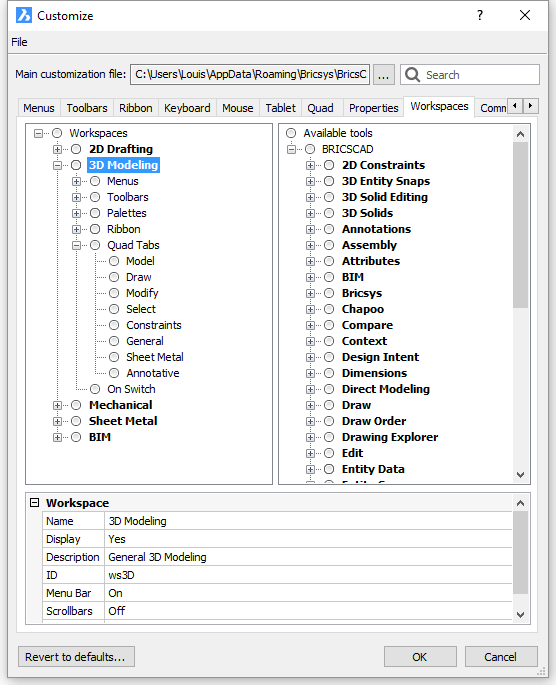
- To set the availability of a tab, select the tab
then click the Display field in the
Properties grid and choose Yes or
No.
- To add a tab do one of the following:
-
Right click the Quad Tabs node and choose
Appand Quad tab in the context menu to add a tab at the bottom of
the tab list.
-
Select a tab, then right click and choose
Insert in the context menu to add a tab above the selected tab.
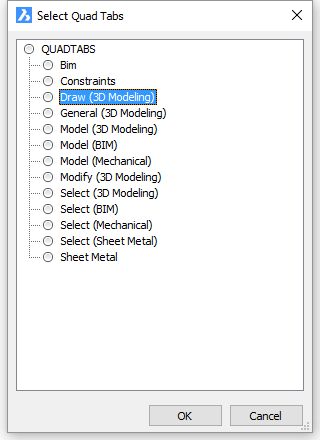
On the Select Ribbon
Tab dialog select the tab you want to insert and click the
OK button.
- To remove a tab, select the tab, then right and choose
Delete in the context menu.
- To change the tab order: drag and drop the tabs in the
list.
|
© Menhirs NV. All rights reserved. |