General procedure to create custom tools
(option) Add toolbox(es) in a Menu Group.
(option) Add tools in a toolbox
(option) Add Main Menu(s)
(option) Add menu items in a menu
(option) Add Context Menu(s)
(option) Add toolbar(s)
(option) Add tool(s) to a Toolbar
(option) Add Keyboard Shortcuts
In the Customize dialog do one of the following:
In the File menu, choose Create new partial CUI file ... .
Place the cursor on Menu group, then right click an choose Create new partial CUI file ... in the context menu.
The Create a Customization File dialog opens.
By default the new partial CUI file will be created in the Support folder of the Roamable root folder .
(option) Select a different folder to save the CUI file.
Type a name for the new CUI file in the File name field.
Click the Save button.
The newly created Partial CUI file is loaded and a Menu Group of the same name is created in the Menus tree, Toolbars tree, Keyboards tree and Available Tools tree.
To add a toolbox in a menu group
In the Customize dialog select a menu group.
Right click and choose Append toolbox in the context menu.
Type a name for the new toolbox in the Title field of the Add toolbox dialog.
Click the OK
button.
The toolbox is added in the Available
Tools tree.
Click the Apply button to save the definition.
In the Customize dialog select a toolbox in the Available Tools tree.
Right click and choose Append tool in the context menu.
Type a name for the new tool in the Title field of the Add tool dialog.
Click the OK
button.
The tool is added in the toolbox.
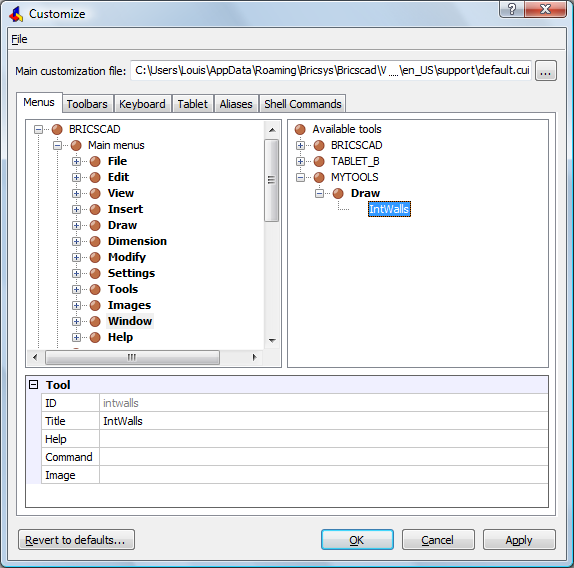
(option) Type a help string in the Help field of the properties grid.
Type a command or command macro in the Command field of the properties grid.
In the above example the Command field contains a macro that makes
the InteriorWalls layer current, then
launches the polyline command.
If the layer does not exist yet, it is created first.
To assign an image to the tool proceed with steps 5 and 6 in the Create a new tool procedure.
Click the Apply button to save the tool definition.
|
NOTE |
|
In the Customize dialog click the Menus tab.
Do one of the following:
Click the Main Menus subgroup of the menu group, then right click and choose Append main menu in the context menu.
Select an existing menu in the Main Menus subgroup, then right click and choose Insert main menu in the context menu.
New menus are added above the selected existing menu or as the first menu if you select the Main Menus subgroup.
Type a name in the Title field of the Add main menu dialog.
Click the OK button.
(option) Repeat steps 2 through 5 to add more menus.
Click the Apply button to save the definition(s).
|
NOTE |
The new main menu is not added to the Menu bar until at least one menu items is added to it. |
In the Customize dialog click the Menus tab.
If collapsed, expand the menu group (e.g. Bricscad).
If collapsed, expand the Main menus group of the menu.
Do one of the following:
Select the menu, then right click and choose
Append item in the context menu.
The new item will be added as the first item in the menu.
Select an existing item in the menu, then
right click and choose Insert item in
the context menu.
The new item will be added above the selected existing item.
Do one of the following:
Proceed with the Add an existing tool procedure.
Proceed with the Add a new tool procedure.
(option) Add a Diesel expression in the
Diesel field.
To add an existing tool to a menu, toolbar or shortcut
In the Add Tool dialog choose Select available tool.

Expand the toolbox in the menu group of the menu, toolbar or shortcut in which you want to add the tool.
Select the tool you want to add.
Do one of the following:
Double click the tool.
Click the OK button on the Add tool dialog.
The tool is added.
|
NOTE |
You can select tools of the same menu group only. |
Create a new tool in a menu, toolbar or shortcut
In the Add Tool dialog choose Create new tool.
Select the Toolbox in which you want to create the new tool.

Type a name in the Title field.
Type a help string in the Help field.
Type a command or command macro in the Command field.
In the above example the ^c^c^c-boundary command launches the Boundary
command without a dialog.
Click the browse button at the right hand side of
the Image field.
The Tool image dialog opens.
Do one of the following:
Choose Builtin,
then select one of the built-in images and click the OK button.
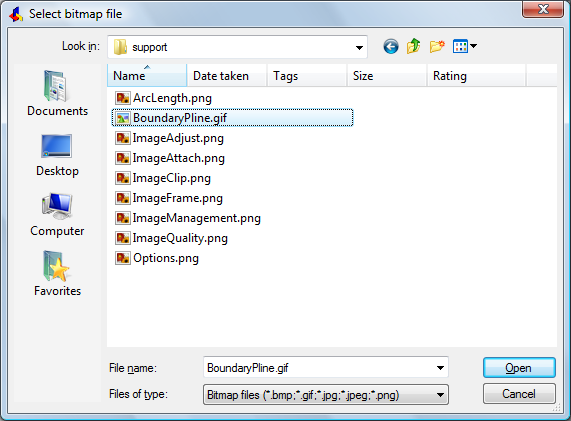
Choose Bitmap
file then click the browse
button.
x
In the Select bitmap file dialog,
select a bitmap and click the Open
button.
Click the OK button to confirm your
choice.

If no path is specified, image files must exist in the Support folder of the Roamable root folder.
If an image file is not found, a question mark icon displays
instead in the menus, toolbars or keyboard shortcuts in which the
tool is used.
Click the OK button on the Add tool dialog.
In the Customize dialog click the Menus tab.
If collapsed, expand the menu group (e.g. Bricscad).
If collapsed, expand the Main menus group of the menu group.
Do one of the following:
Select the menu, then right click and choose Append submenu in the context menu.
Select an existing item in the menu, then right click and choose Insert submenu in the context menu.
New submenus are added above the selected existing item or as the first item if you select the menu.
Type a name in the Title field of the Add submenu dialog.
Click the OK button.
Do one of the following:
Select the submenu, then right click and
choose Append item in the context
menu.
The new item will be added as the first item in the submenu.
Select an existing item in the submenu, then
right click and choose Insert item in
the context menu.
The new item will be added above the selected existing item.
Do one of the following:
Proceed with the Add an existing tool procedure.
Proceed with the Add a new tool procedure.
In the Customize dialog click the Menus tab.
Do one of the following:
Select the Context Menus subgroup of the menu group, then right click and choose Append context menu in the context menu.
Select an existing context menu, then right click and choose Insert context menu in the context menu.
New context menus are added above the selected existing context menu or as the first context menu if you select the Context Menus subgroup.
Select a menu in the menu list of the Add context menu dialog.
Click the OK button.
(option) Repeat steps 2 through 5 to add more context menus.
Click the Apply button to save the definition(s).
|
NOTE |
If you create a context menu in a partial menu group it will only be used if such context menu does not exist in the main menu group. |
In the Customize dialog click the Toolbars tab.
Do one of the following:
Select a menu group, then right click and choose Append toolbar in the context menu.
Select an existing toolbar in a menu group, then right click and choose Insert toolbar in the context menu.
New toolbars are added above the selected existing toolbar or as the first toolbar if you select the menu group.
Type a name in the Title field of the Add toolbar dialog.
Click the OK button.
(option) Adjust the Toolbar properties.

Type a new name in the Title field.
The toolbar name must include alphanumeric characters with no
punctuation other than a dash (&endash;) or an underscore (_).
The Title along with the Alias enables the toolbar to be referenced
programmatically.
Define the display position of the toolbar. The options are: Floating, Top, Left, Bottom or Right. The latter four refer to the window edge where the toolbar will be docked.
Define whether the toolbar displays or not when the CUI file is loaded.
Rows: Specifies the number of rows.
Xval: When the position is Floating, specifies the X coordinate in pixels, measured from the left edge of the screen to the left side of the toolbar.
Yval: When the position is Floating, specifies the Y coordinate in pixels, measured from the top edge of the screen to the top of the toolbar.
(Option) Repeat steps 2 through 6 to add more toolbars.
Click the Apply button to save the definition(s).
In the Customize dialog click the Toolbars tab.
If collapsed, expand the menu group (e.g. Bricscad).
Do one of the following:
Select the toolbar, then right click and
choose Append tool in the context
menu.
The new tool will be added as the first tool in the toolbar.
Select an existing item in the toolbar, then
right click and choose Insert tool in
the context menu.
The new tool will be added above the selected existing item.
Do one of the following:
Proceed with the Add an existing tool procedure.
Proceed with the Add a new tool procedure.
(option) Add a Diesel expression in the
Diesel field.
|
NOTES |
The new toolbar is loaded only if the Display property is set to Show. See Opening a Toolbar for more information on opening toolbars. |
In the Customize dialog click the Toolbars tab.
If collapsed, expand the menu group (e.g. Bricscad).
Do one of the following:
Select the toolbar, then right click and
choose Append control in the context
menu.
The new control will be added as the first item in the toolbar.
Select an existing item in the toolbar, then
right click and choose Insert control
in the context menu.
The new control will be added above the selected existing item.
Select a control in the Add control dialog.

Click the OK button.
In the Customize dialog click the Toolbars tab.
If collapsed, expand the menu group (e.g. Bricscad).
Select an existing item in the toolbar, then right
click and choose Insert flyout in the
context menu.
The flyout is added above the selected item.
Type a name in the Title field of the Add flyout dialog.
Click the OK button.
Do one of the following:
Select the flyout, then right click and
choose Append tool in the context
menu.
The new tool will be added as the first tool in the flyout.
Select an existing item in the flyout, then
right click and choose Insert tool in
the context menu.
The new tool will be added above the selected existing item.
Do one of the following:
Proceed with the Add an existing tool procedure.
Proceed with the Add a new tool procedure.
(option) Add a Diesel expression in the
Diesel field.
In the Customize dialog click the Keyboard tab.
If collapsed, expand the menu group (e.g. Bricscad).
Do one of the following:
Select the menu group, then right click and
choose Append shortcut in the context
menu.
The new shortcut will be added at the end of the shortcut list.
Select an existing shortcut in the toolbar,
then right click and choose Insert
shortcut in the context menu.
The new shortcut will be added above the selected existing
shortcut.
Do one of the following:
Proceed with the Add an existing tool procedure.
Proceed with the Add a new tool procedure.
In the Properties grid of the new shortcut select Key field, then press the key combination you want to assign to the shortcut.
| Bricscad™ is commercialized by Bricsys NV. Bricsys NV and Vondle NV are fully owned subsidiaries of Menhirs NV. Copyright © 2001- Menhirs NV - All rights reserved. |