Do one of the following:
Click the Text
tool button (![]() ) on the Draw 2D toolbar.
) on the Draw 2D toolbar.
Choose Text in the Text submenu in the Draw menu.
Type text in the command bar, then press Enter.
The Text command creates single line text, while the Mtext command creates text entities which consist of multiple lines.
Do one of the following:
Click the Text
tool button (![]() ) on the Draw 2D toolbar.
) on the Draw 2D toolbar.
Choose Text in the Text submenu in the Draw menu.
Type text in the command bar, then press Enter.
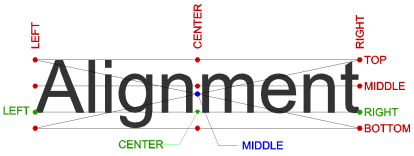
The command bar reads: Text: Style/Align/Fit/Center/Middle/Right/Justify/<Start point>:
Specify the insertion point of the text.
The command bar reads: Height of text <current height>:
Do one of the following:
Press Enter or right click to accept the current text height.
Type the new text height in the command bar, then press Enter.
Define the new text height graphically by specifying two points in the drawing.
The command bar reads: Rotation angle of text <current angle>
Do one of the following:
Press Enter or right click to accept the current angle.
Type the new angle in the command bar, then press Enter.
Define the now angle graphically by specifying two points in the drawing.
The command bar reads: Text:
Type the text in the command bar, then press
Enter.
The text is placed in the drawing.
The command bar reads: Text:
Do one of the following:
Repeat step 5 to create another text
entity.
The new text is placed below the previous one.
Press Enter or right click to conclude the Text command.
|
NOTE |
If you have already created text, the most recent text entity highlights when you repeat the Text command. If you want to place the new text right below the previously created text, press Enter in step 2 of the above procedure. |
|
|
|
Do one of the following:
Click the Multiline
Text tool button (![]() ) on the Draw 2D toolbar.
) on the Draw 2D toolbar.
Choose Multiline Text in the Text submenu in the Draw menu.
Type mtext in the command bar, then press Enter.
The command bar reads: First corner for block of text:
Specify the first corner (insertion point of the
multiline text).
The command bar reads:
Justification/Rotation/Style/Height/Direction/Width/<Opposite
corner for block of text>:
Do one of the following:
Specify the opposite corner of the text block to define the maximum width of the multiline text.
Type @ in the command bar, then press Enter for non-wrapped (zero width) text.
The Text formatting
toolbar opens right above the text block.

(option) Define the text properties.
Type your text.
Click the OK button
to stop editing the text.
The Text formatting toolbar
closes.
|
Button or setting |
Name |
Description |
|
|
Text Style |
Sets the text style |
|
|
Text Font |
Sets the text font |
|
|
Text Height |
Sets the text height |
|
|
Bold |
Creates bold text |
|
|
Italic |
Creates italic text |
|
|
Underscore |
Creates underscored text |
|
|
Overscore |
Creates overscored text |
|
|
Uppercase |
Converts selected text to uppercase |
|
|
Lowercase |
Converts selected text to lowercase |
|
|
Layer |
Sets the text layer |
|
|
Oblique Angle |
Sets the oblique angle |
|
|
Width Factor |
Sets the width factor |
|
|
Character Spacing |
Sets the character spacing |
|
|
Undo |
Undoes recent actions |
|
|
Redo |
Redoes previously undone actions |
|
|
Stacked Fraction |
Creates stacked fractions |
|
|
Special Character |
Inserts special characters |
|
|
Justify |
Sets the text justification |
|
|
Field |
Inserts a variable field |
|
|
OK |
Closes the Text formatting toolbar and applies the changes |
|
|
Cancel |
Closes the Text formatting toolbar and leaves the Mtext entity unchanged |
|
NOTE |
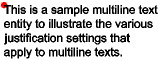
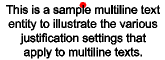
If the line length exceeds the Width of the multiline text, the text will be wrapped. Set the Width to zero for non-wrapped multiline text. |
|
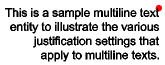
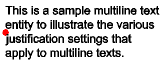
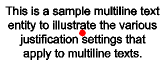
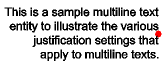
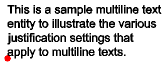
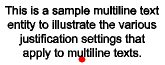
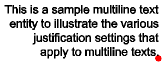
(The red dot indicates the insertion point of the multiline text entity) |
||
|
|
|
|
|
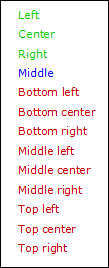
Top left |
Top center |
Top right |
|
|
|
|
|
Middle left |
Middle center |
Middle right |
|
|
|
|
|
Bottom left |
Bottom center |
Bottom right |
Including special text characters and symbols
You can use control codes and unicode strings to include special characters in text entities.
To include control codes, as you type text, type two percent symbols (%%) followed by the special control code or character. A single percent sign is treated as a normal text character.
|
Control code |
Unicode String |
Result |
|
%%d |
\U+00B0 |
Draws a degree symbol (º) |
|
%%p |
\U+00B1 |
Draws a plus-or-minus symbol (±) |
|
%%c |
\U+2205 |
Draws a diameter symbol (Ø) |
|
Name |
Symbol (*) |
Unicode String |
|
Almost equal |
|
\U+2248 |
|
Angle |
|
\U+2220 |
|
Center line |
|
\U+2104 |
|
Delta |
|
\U+0394 |
|
Electrical phase |
|
\U+0278 |
|
Identity |
|
\U+2261 |
|
Not equal |
|
\U+2260 |
|
Omega |
|
\U+03A9 |
|
Squared |
² |
\U+00B2 |
|
Cubed |
³ |
\U+00B3 |
(*) If supported by the text font.
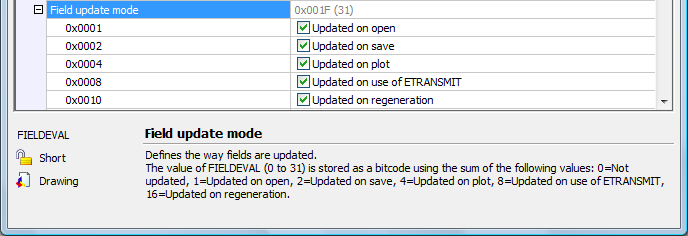
Using fields in multiline texts
Fields can be used to insert drawing properties and custom properties in a multiline text, e.g. in title blocks.
Command: UPDATEFIELD
The FIELDEVAL system variable controls when fields in multiline texts are updated.
You can set FIELDEVAL under Program Options / User Preferences on the Settings dialog.
| Bricscad™ is commercialized by Bricsys NV. Bricsys NV and Vondle NV are fully owned subsidiaries of Menhirs NV. Copyright © 2001- Menhirs NV - All rights reserved. |