
Works with Bricscad (Windows) Classic, Pro and Platinum, Bricscad (Linux) Classic and Pro
Fills closed areas with repeating patterns; displays prompts at the command bar.
Accessing the Command
command bar: -hatch
aliases: -bh, h, -bhatch
: -hatch
Prompts you in the command bar:
Current hatch pattern: ANSI31
Specify internal point or [Properties/Select/Remove islands/Advanced/Draw order/Origin]: (Pick a point inside a closed area, or enter an option.)
Specify internal point or [Properties/Select/Remove islands/Advanced/Draw order/Origin]: (Pick another point, enter an option, or press Enter to end the command.)
Examples of hatch patterns.
Command Options
|
Option |
Description |
|
Reports the name of the current hatch pattern; you can change the pattern name with the Properties option. |
|
|
Pick a point inside a closed area; Bricscad creates an invisible boundary, and then hatches the area. You can pick more than one area to hatch at a time. |
|
|
Enter a pattern name |
Specifies the name of the hatch pattern. |
|
? to list patterns |
Lists the names of all patterns; reminds you of their names. Press F2 to see the list in the Text window. |
|
Solid |
Specifies a solid filled hatch. |
|
User defined |
Allows you to define simple hatch patterns based on angle, scale, and crosshatching. |
|
Proceed |
Skips the next two prompts, and returns to the original prompt. |
|
Scale for pattern |
Specifies the scale factor of the hatch pattern. The scale factor is usually the same as that of text and linetypes. |
|
Angle for pattern |
Specifies the angle at which the pattern is drawn. |
|
User Defined |
|
|
Proceed |
Skips the following prompts, and returns to the original prompt. |
|
Space between standard pattern lines |
Specifies the distance between hatch lines. |
|
Angle for lines |
Specifies the angle at which the pattern is drawn. |
|
Cross-hatch area? |
Applies the pattern a second time at 90 degrees to the first. |
|
|
|
|
Prompts you to select the entities making up the boundary: Select entities - select one or more entities. Select entities - press Enter to return to original prompt. |
|
|
Prompts you to select island (interior) entities, which will be hatched through. |
|
|
Boundary set |
Specifies the entities to consider for creating boundaries: Specify candidate set for boundary - enter E or N.
|
|
Retain boundary |
Determines whether the temporary boundary created by Bricscad is retained after the command ends: Retain derived boundaries - enter Y or N.
|
|
Island detection |
Toggles whether islands (interior boundaries) are hatched over or not: Do you want island detection? - enter Y or N.
|
|
Style |
Specifies how islands are treated: Enter hatching style - enter N, O, or I.
|
|
Associativity |
Toggles whether hatches are associative: Associativity hatch? - enter Y or N.
|
|
Tolerance |
Specifies the largest gap that Bricscad will close when hatching open areas: New value for the boundary tolerance - enter a number. |
|
|
|
|
Specifies whether the hatch pattern appears visually above or below overlapping entities: Enter an option - enter an option.
|
|
|
Prompts for a new hatch origin point: New value for the hatch origin - enter x,y coordinates, or pick a point in the drawing. Use entity snaps to pick the origin accurately. |
|
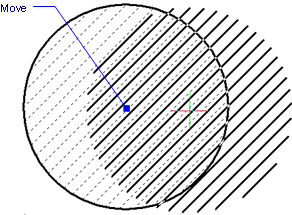
Grips Editing
Hatches can be edited directly through grips:
Select the hatch. Notice that it has one grip.
Drag the grip to move the hatch.
Related Commands
Hatch - place hatch patterns through a dialog box.
Boundary and -Boundary place a polyline boundary inside closed areas.
Properties - changes the properties of hatch patterns.
Settings - specifies the default parameters for hatch patterns.
Solid - draws 3- and 4-side solid-filled areas.
| © Menhirs NV. All rights reserved. |