Works with Bricscad (Windows) Classic, Pro and Platinum, Bricscad (Linux) Classic and Pro
Specifies default settings for plotting drawings.
Accessing the Command
command bar: pagesetup
menu bar: File | Page Setup
toolbar: Layout | ![]()
: pagesetup
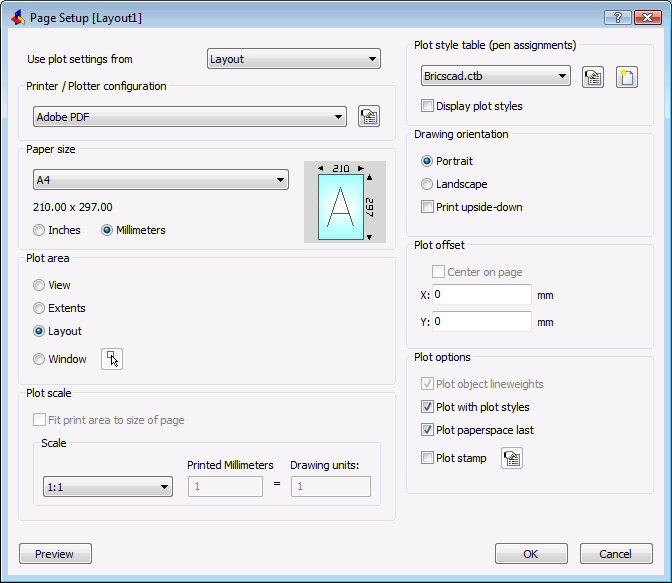
Displays a dialog box:
Choose options, and then click OK.
Command Options
|
Option |
Description |
|
Recalls plot settings used previously:
|
|
|
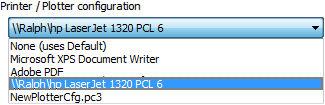
Selects the printer or plotter. Bricscad works with any output device installed on the system, including networked printers, print to file, faxes, and PostScript devices. It also uses predefined printer parameters stored in PC3 files. See PlotterManager command. |
|
|
|
Opens the printer's Properties dialog box for customizing the printer's parameters. |
|
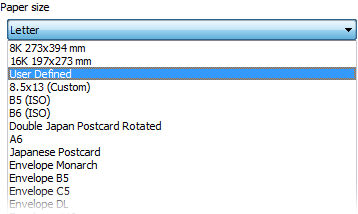
Chooses the size of paper. You can select standard sizes listed by the droplist; these are sizes supported by the printer. While printer may appear to support many different sizes, you should select only the size of paper that is actually in the printer. If User Defined appears in the list, the paper's dimensions are specified by the printer's Properties dialog box. The image indicates the size, position and orientation of the current plot area on the selected paper size. |
|
|
Units
|
Switches paper measurements between imperial and metric.
|
|
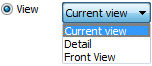
Specifies which area of the drawing to print:
Choose a view from the droplist:
Entities on frozen layers are not taken into account when calculating the extents.
You define the rectangular area by entering x,y coordinates or by clicking the Select Area to be Printed button. |
|
|
Select area to be printed
|
Specifies the rectangular area to be printed. Click the Select first corner of window - specify one corner of the rectangle. Select second corner of window - specify the other corner. You can pick points or enter x,y coordinates. The Print dialog box returns, with the pair of x,y coordinates added to the Windows Plot Area boxes. |
|
|
Specifies the x,y coordinates of the lower-left and upper-right corners of the rectangular area to be printed. You can enter x,y coordinates, or click the |
|
Scales the drawing so that it fits the printable area of the paper. The scale is calculated automatically by Bricscad, and takes into account the print area of the drawing. The printable area is the size of the paper, minus the margins. The margins are the strips along the four edges that the printer uses for handling the paper. When this option is turned on, you cannot specify the scale factor. |
|
|
|
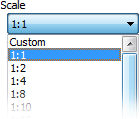
Specifies the scale factor of the printed drawing. Choose a scale factor from the droplist, or select Custom to specify a scale factor.
For scale factors like 1:5, the drawing is scaled smaller. For scale factors like 5:1, the drawing is scaled larger. |
|
|
Specifies user-defined scale factors. For example, to print a drawing of 50'-long house on paper 11" wide, enter: Printed Inches = 11" Drawing Units = 50' Bricscad works out the scale factor automatically. |
|
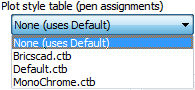
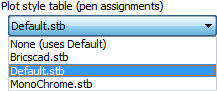
Specifies the plot style table to use, which assigns properties to "pens," colors, and entities. If the drawing does not use plot styles, then only CTB (color-based table) files are listed. If the drawing uses plot styles, then only STB (style-based table) files are listed.
When you switch from Non to a named plot style, Bricscad prompts you: Assign plot style table to all layouts? - click Yes or No.
|
|
|
Edit Plot Style
|
Opens the Plot Style Table editor dialog box. See PlotStyle command. This button is available only when the drawing uses STB plot styles. |
|
Create New Plot Style
|
Creates new plot styles; runs the Add Plot Style Table wizard. If the drawing does not use named plot styles, then the wizard creates new color-dependent tables (CTB files). If the drawing uses named plot styles, then the wizard creates new named plot style tables (STB files). See StylesManager command. |
|
|
Toggles the display of plot style names. |
|
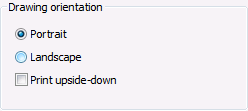
Specifies the orientation of the drawing on rectangular paper:
|
|
|
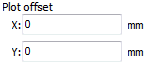
Specifies the offset distance for the print. Enter positive or negative distances to move the drawing in the x and/or y distances:
The lower left corner of the drawing is moved by the specified distance. This is useful when the paper has a title block area that might interfere with the drawing. |
|
|
|
Centers the print on the page. The center of the drawing is positioned in the center of the paper. Together with Fit Print Area to Size of Page, these options are excellent for prints were scale is unimportant. |
|
Toggles the use the lineweights:
This option is unavailable when Plot with Plot Styles is turned on. |
|
|
|
Toggles the use of plot styles:
Plot styles override lineweight settings. |
|
|
Toggles printing order:
This option is available only when printing layouts; it is unavailable in model tab. |
|
|
Toggles saving of print options:
The next time you use this dialog box, you can select "Layout" from the Use Plot Settings From droplist. |
|
|
Toggles use of the plot stamp:
Click the |
|
|
Displays the Plot Stamp dialog box. |
|
Displays a preview of the print. In the preview window, click the Print Settings button to return to this dialog box. See Preview command. |
|
|
Saves the changes and returns to the drawing. |
|
|
Returns to the drawing editor. |
Related Commands
ConvertCtb - converts CTB plot style files to STB files.
ConvertPStyles - converts drawings from CTB to STB plot styles.
PlotStyle - sets the current plot style.
Print - plots drawings with plot styles.
Properties - changes plot styles assigned to entities.
StylesManager - creates and attaches plot styles to drawings.
| © Menhirs NV. All rights reserved. |