The Hatch command fills an enclosed area in your drawing with a pattern.
The Gradient command creates solid fills in nine different patterns and one or two colors.
The area can either be a single entity such as a circle or a closed polyline or an area enclosed by a selection of entities.
To create the hatch you can click inside the closed perimeter of a boundary or you can select entities.
General procedure to create hatches and gradient fills
Do one of the following:
Click the Hatch
tool button (![]() ) or the Gradient tool button (
) or the Gradient tool button (![]() ) on the Draw 2D toolbar.
) on the Draw 2D toolbar.
Choose Hatch... or Gradient... in the Draw menu.
Type hatch or gradient in the command bar, then press enter.
The Hatch and Gradient dialog displays.
Do one of the following:
Click the Hatch tab to create a hatch, then define the hatch properties.
Click the Gradient tab to create a gradient fill, then define the gradient fill properties.
Define the boundary for the hatch or gradient fill.
Click the OK button to create the hatch or gradient fill.
On the Hatch and Gradient dialog click the Hatch tab.
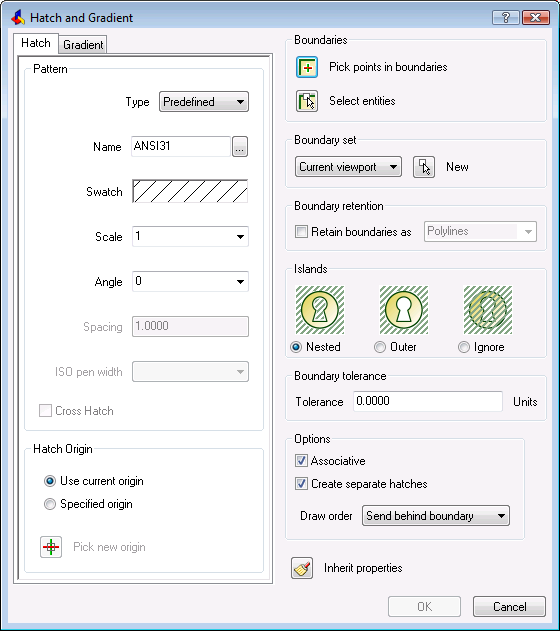
(option) Select the Pattern Type.
![]()
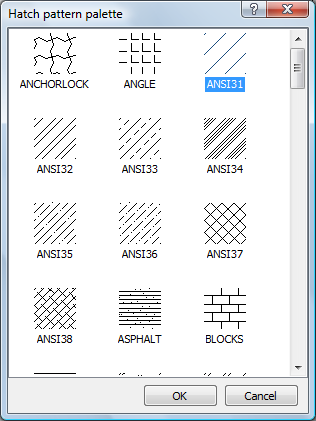
(option) If the Pattern
Type is Predefined, select a
Pattern Name in the Hatch pattern palette,
then double click the pattern or click the OK Button.
(option) If the Pattern Type is Predefined, do one of the following:
Type a scale in the Scale settings field.
Choose the scale from the drop down list.
(option) Do one of the following:
Type an angle in the Angle settings field.
Choose the angle from the drop down list.
(option) If the Pattern Type is User defined, specify the Pattern Spacing.
(option) If the Pattern Type is User defined, select the Cross Hatch option.
To define gradient fill properties
On the Hatch and Gradient dialog click the Gradient tab.
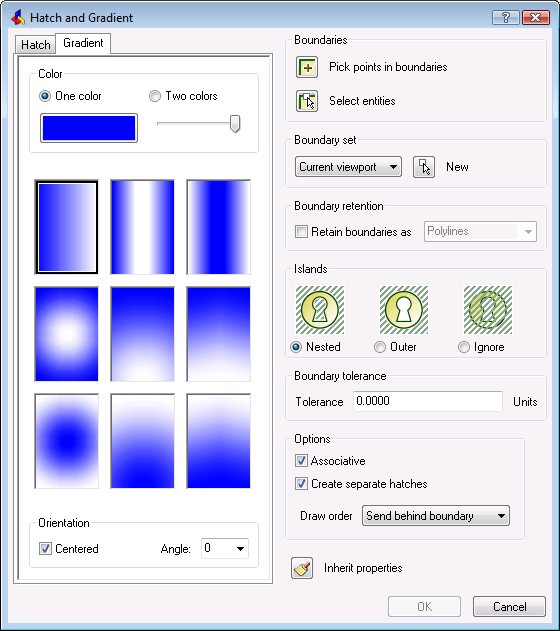
(option) Click the One color radio button to create a 'color to white' or 'color to black' gradient fill.
Click the colored tile to open the Select color dialog, to pick a different base color.
The color slider sets the transition from
color to white or black.
Press and hold the left mouse button to move the color slider
(![]() ) .
) .
Move the slider to the far right to create a 'color to white'
gradient fill.
Move the slider to the far left to create a 'color to black'
gradient fill.
(option) Click the Two color radio button to create
'two color' gradient fill.
Click the colored tiles to open the Select
color dialog to pick the base colors.
Select one of the 9 gradient patterns.
The options are: linear, cylindrical, inverted cylindrical,
spherical, hemispherical, curved, inverted spherical, inverted
hemispherical and inverted curved.
(option) Centered: If centered, the gradient fill is created symmetrical; if not centered, the gradient fill is built up from the left of the boundary.
(option) Angle: Specifies the angle of the gradient fill, relative to the current UCS.
To define the boundary for a hatch or gradient fill
(option) Select the Boundary retention option.
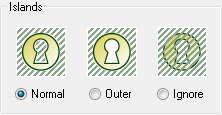
(option) Select an Island option.
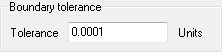
(option) Adjust the Boundary tolerance.
(option) Select the Associative option.
(option) Select the Create
Separate Hatches option.
In case multiple boundaries are detected or multiple entities are
selected in step 9, separate hatches are created instead of a
single hatch.
(option) Choose a Draw
order option.
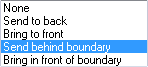
This option is reset to Send behind
boundary when the drawing is closed and reopened.
(option) Click the New button (![]() ) to select a Boundary
set.
) to select a Boundary
set.
The Hatch and Gradient dialog
temporarily closes to let you select entities.
(see also the note below)
(option) Click the Specified
Origin radio button, then click the Pick a new origin button (![]() ).
).
The Hatch and Gradient dialog
temporarily closes to let you specify a new origin.
Do one of the following:
Click the Pick
Points button (![]() ).
).
The Hatch and Gradient dialog
closes.
The command bar reads: Select a point to define a boundary or hatch
area:
Specify a point in each of the areas you want to
hatch.
The command bar reads: Select a point to define a boundary or hatch
area:
Right click or press Enter to stop adding
areas.
The Hatch and Gradient dialog
displays again.
Click the Select
Entities button (![]() ).
).
The Hatch and Gradient dialog
closes.
The command bar reads: Select entities:
Select the entities you want to hatch.
Right click or press Enter to stop selecting entities.
The Hatch and Gradient dialog
displays again.
(option) Click the Specified
Origin radio button, then click the Pick a new origin button (![]() ).
).
The Hatch and Gradient dialog
temporarily closes to let you specify a new origin.
|
NOTE |
If a selection set was active when you launch the Hatch tool, this selection will be used as the Boundary Set if you click the New button in step 11 in the above procedure. In this case the Hatch and Gradient dialog closes and immediately reopens. |
| © Menhirs NV. All rights reserved. |