![]()
![]()
![]()
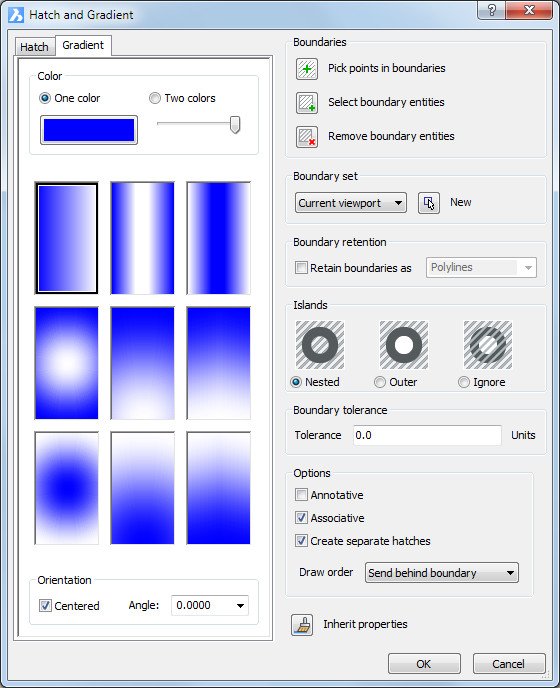
Fills closed areas with solid fills in nine different patterns and one or two colors; displays the Hatch and Gradient dialog box.
Accessing the Command
command bar: Gradient
aliases: none
menu bar: Draw | Gradient
toolbar: Draw | ![]()
: Gradient
Displays a dialog box:
Choose options, and then click OK.
Command Options
|
Color Options |
Description |
|
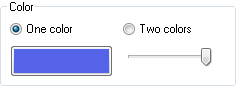
One color: Click the colored tile to choose a different base color. Press and hold the left mouse button to move the slider:
|
|
|
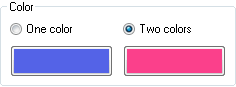
Two colors: Click the colored tiles to choose a different colors. |
|
|
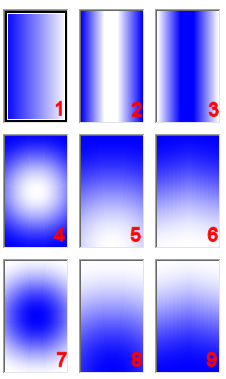
Gradient fill pattern name: Click a pattern. The options are: Linear (1) - Cylindrical 2() - Inverted Cylindrical (3) Spherical (4) - Hemispherical (5) - Curved (6) Inverted Spherical (7) - Inverted Hemispherical (8) - Inverted Curved (9) |
|
|
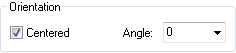
Orientation: Centered: The gradient fill is created symmetrical; Not centered: The gradient fill is built up from the left of the boundary. Angle: Specifies the angle of the gradient fill, relative to the current UCS. |
|
|
|
|
|
Boundaries |
|
|
Specifies the closed areas (boundaries) in which to place the hatch pattern; temporarily dismisses the dialog box, and then prompts you at the command bar: Select a point to define a boundary or hatch area - pick a point inside a closed area. Notice that BricsCAD immediately draws the hatch, allowing you to preview its scale factor, angle, origin, and other parameters. The prompt repeats, allowing you to choose additional areas to hatch. When done selecting areas, press Enter: Select a point to define a boundary or hatch area - press Enter to return to the dialog box. You cannot pick an area that already contains a hatch pattern, or areas that are not closed. |
|
|
Selects the entities that make up a hatch pattern boundary; temporarily dismisses the dialog box, and then prompts you at the command bar: Select entities - use any selection method to choose one or more entities. The prompt repeats, allowing you to choose additional entities. When done selecting entities, press Enter: Select entities - press Enter to return to the dialog box. This option allows you to hatch closed areas that already contain a hatch; it does not hatch open areas. |
|
|
Prompts you to remove entities from the detected boundary set. |
|
|
|
|
|
Boundary Set |
|
|
Specifies where BricsCAD should search for entities that make up the hatch boundary:
|
|
|
Creates a new selection set of entities that make up the pattern boundary; temporarily dismisses the dialog box, and then prompts you at the command bar: Select entities - use any selection method to choose one or more entities. The prompt repeats, allowing you to choose additional entities. When done selecting entities, press Enter: Select entities - press Enter to return to the dialog box. The next step is to click the Pick Points in Boundaries button to choose the hatch area. If a selection exists when you launch the Gradient command, and if PICKFIRST is ON, the Hatch and Gradient dialog box immediately reopens when you click the New button. |
|
|
|
|
|
Boundary Retention |
|
|
Toggles whether boundaries are retained:
|
|
|
Specifies the entity used for the boundary: Polylines - makes the boundary from a polyline. |
|
|
|
|
|
Islands |
|
|
When a closed hatch boundary contains other boundaries, BricsCAD hatches alternating areas. |
|
|
When a closed hatch boundary contains other boundaries, BricsCAD hatches only the outermost area. |
|
|
When a closed hatch boundary contains other boundaries, BricsCAD hatches all interior areas, as if they were not present. |
|
|
|
|
|
Boundary Tolerance |
|
|
Specifies the largest gap BricsCAD ignores when hatching a boundary that is not fully closed. The gap tolerance is saved in the HPGAPTOL system variable. |
|
|
|
|
|
Options |
|
|
Sets the Annotative property of the hatches. |
|
|
Toggles the associativity of hatch patterns:
The Associative option is not available for annotative hatches. |
|
|
If checked, creates a separate gradient entity for each boundary in the selection. If not checked, creates a compound gradient entity. |
|
|
Specifies where the pattern should be placed relative to other entities:
|
|
|
|
|
|
Copies the properties of another, existing gradient entity; temporarily dismisses the dialog box, and then prompts you at the command bar: Select hatch entity to copy properties from: (Use any selection method to choose a single hatch pattern.) This button is useful for quickly setting options of a new hatch based on existing hatches. |
|
Procedures
Defining the MEASUREMENT setting
General procedure to create hatches and gradient fills
To define gradient fill properties
To define the boundary for a hatch or gradient fill
To edit a hatch or gradient fill
Grips Editing
Gradient fills can be edited directly through grips:
Select the hatch. Notice that it has one grip.
Drag the grip to move the hatch.
Related Commands
Hatch - places hatch patterns through a dialog box.
-BHatch and -Hatch - places hatch patterns through the command bar.
Boundary and -Boundary place a polyline boundary inside closed areas.
HatchEdit - edits hatches and gradient fills in a dialog box.
-HatchEdit - edits the boundaries of hatch and gradient entities; displays prompts in the command bar.
Properties - changes the properties of hatch patterns.
Settings - specifies the default parameters for hatch patterns.
Solid - draws 3- and 4-side solid-filled areas.
| © Menhirs NV. All rights reserved. |