Commands: IMAGE, IMAGEADJUST, IMAGEATTACH, IMAGECLIP, IMAGEFRAME, IMAGEQUALITY
The Image command Inserts images in drawings through the Images Explorer.
The Imageadjust command adjusts the properties of images through the Properties bar.
The Imageattach command attaches raster images to the drawing.
The Imageclip command clips images.
The Imageframe command toggles the display of the frame around images.
The Imagequality command toggles the display quality of images between draft and high.
To open the Images Explorer do one of the following:
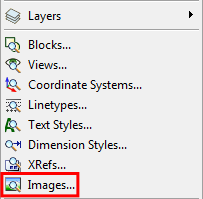
Choose Images in the Settings menu.

Click the Image
Management tool button (![]() ) in the Images toolbar.
) in the Images toolbar.
Type image in the command bar, then press Enter.
Select Images in the Open Drawings sub-window of the Drawing Explorer.
In the Images Explorer you can:
Place
images (![]() ) or (
) or (![]() )
)
You can choose between Detail View (list), Icon View and Tree View to see the images in the current drawing.
Open the Detail View of the Images Explorer
Click the Detail View button
(![]() ) in the Drawing Explorer toolbar. The Detail View button is now pressed (
) in the Drawing Explorer toolbar. The Detail View button is now pressed (![]() ), indicating the image details are
displayed.
), indicating the image details are
displayed.
The selected image displays in the Preview sub-window of the Drawing Explorer.
|
|
|
Detail View of the images in the current drawing |
Open the Icon View of the Images Explorer
Click the Icon View
button (![]() ) in the Drawing Explorer toolbar. The Icon View button is now pressed (
) in the Drawing Explorer toolbar. The Icon View button is now pressed (![]() ), indicating the image icons are
displayed.
), indicating the image icons are
displayed.
The selected image displays in the Preview sub-window of the Drawing Explorer.
|
|
|
Icon View of the images in the current drawing |
Open the Tree View of the Images Explorer
Click the Tree View
button (![]() ) in the Drawing Explorer toolbar. The Tree View button is now pressed (
) in the Drawing Explorer toolbar. The Tree View button is now pressed (![]() ), indicating the image tree is
displayed.
), indicating the image tree is
displayed.
The selected image displays in the Preview sub-window of the Drawing Explorer.
|
|
|
Tree View of the images in the current drawing |
Do one of the following:
Launch the Image
Explorer, then click the New
tool button (![]() ) in the Drawing Explorer - Images toolbar.
) in the Drawing Explorer - Images toolbar.
Launch the Image
Explorer, select a raster image file in the list, then
click the Insert tool button
(![]() ) in the Drawing Explorer -
Images toolbar.
) in the Drawing Explorer -
Images toolbar.
Click the Attach
Raster Image tool button (![]() ) in the Images toolbar.
) in the Images toolbar.
Choose Attach Raster Image in the Images menu.
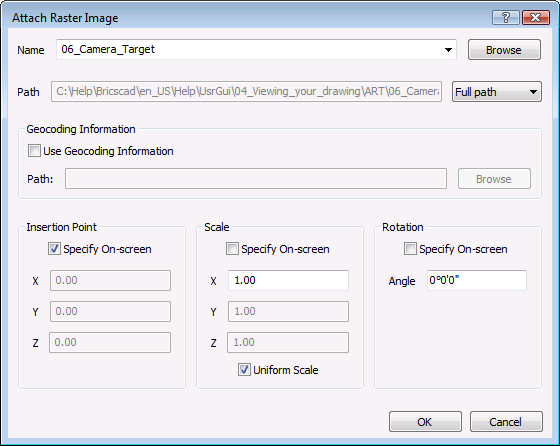
The Attach Raster Image dialog opens.

Do one of the following:
Accept the currently selected image file.
Click the down arrow button in the
Name field to select a different
raster image file in the list.
Raster images which are already attached are listed.
Click the Browse button to select a new raster image file in the Select Raster Image dialog.
(option) Check the , then click the Browse button to open an appropriate world file
to be used with the selected raster image.
If the Use Geocoding Information
option is checked, the Insertion
Point, Scale and Rotation settings fields are not available.
(option) Do the following:
Specify an insertion point or select the Specify on-screen check box.
Specify scale or select the Specify on-screen check box.
Specify rotation angle or select the Specify on-screen check box.
Click the OK button.
If none of the Specify
on-screen options is selected, the image is inserted at the
desired insertion point, scale and rotation angle;
else
You are prompted to specify the insertion point, scale and/or
rotation angle on-screen.
When an image is attached and then inserted in the drawing, you can unload the image to temporarily remove it. Unloaded images are still inserted in the drawing, but they no longer display. If the Imageframe setting is ON, the frame around the image still displays though.
Load / Unload a single image
Launch the Image Explorer.
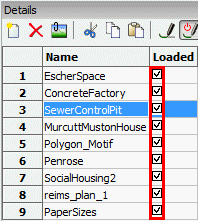
For the image you want to load or unload, click the
check box in the Loaded column.

If the Regen On/Off
button (![]() ) is not pressed, click the
Regen tool (
) is not pressed, click the
Regen tool (![]() ) in the Images Explorer
toolbar.
) in the Images Explorer
toolbar.
|
NOTE |
It is not necessary to select the image first in step 2. |
Load / Unload multiple images
Launch the Image Explorer.
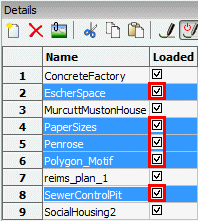
Select the images you want to load or unload.
For one of the selected images, click the check box in the Loaded column.

All selected images will be loaded or unloaded simultaneously.
If the Regen On/Off
button (![]() ) is not pressed, click the
Regen tool (
) is not pressed, click the
Regen tool (![]() ) in the Images Explorer
toolbar.
) in the Images Explorer
toolbar.
|
NOTE |
Press and hold the Ctrl key to select multiple images. |
Since an image is first attached, then inserted in the drawing, you can delete an image, without detaching it.
Launch the Image Explorer.
Select the image(s) that you want to detach.
Do one of the following
Click the Delete tool button (![]() ) in the Images Explorer
toolbar.
) in the Images Explorer
toolbar.
Right click and select Delete in the context menu.
|
NOTE |
Press and hold the Ctrl key to select multiple images. |
| © Menhirs NV. All rights reserved. |